Jacksonville Terminal Co. N-Scale Container Magnet Kits: A Much-Needed Addition to the Market!
Published: 2019-12-08 - By: gdm
Last updated on: 2021-08-12
Last updated on: 2021-08-12
visibility: Public - Headline

Jacksonville Terminal Company (JTC) is a new player in the N Scale space. They are using models of intermodal containers to ease themselves into the N Scale market. When I met with Steve Campbell and Stan Brooks, the principals, at the latest NSE convention in June of 2019 in Chicago Illinois, they showed me their intermodal truck chassis (which they released in November 2019) and mentioned some really cool upcoming projects. But that is a story for another day. Today we are looking at their N Scale magnetic conversion kit for other manufacturers' containers. These are retro-fit kits that allow the modeler to upgrade non-magnetic containers to magnetic ones.
So why would anyone want this? Kato established the benchmark of magnetized containers when they introduced their Maxi-I and Maxi-IV articulated double-stack container cars. Each well of the Kato cars models a prototype that holds TWO containers, one stacked on the other. To run these cars, you need to stack one car on the other. Two keep the upper car from falling off while you are running trains with these cars, Kato installed magnets inside the containers so they would 'stick' together and not have the upper container fall off while your trains are running. Brilliant and simple.
However, none of the other manufacturers of N Scale containers followed suit. Years ago, I heard Dave Ferrari of Deluxe Innovations give a talk on N Scale production where he explained why Deluxe did not put magnets in their N Scale containers. He presented a number of very good reasons why this was a bad idea, but for the life of me, I cannot remember any of them. Obviously, Walthers, Micro-Trains and Atlas agreed with Dave, as their containers also do not have magnets. Even the newest player (other than JTC), ScaleTrains.com did not add magnets to their fancy 53' reefer containers.
One simple solution to this is to simply glue the two containers together. The lower one is locked into the well car by the well, and the upper car is glued to the lower one. This works, but it prevents the modelers from moving the containers around once they are glued in place. Also, many modelers are 'accidental collectors' (see TroveStar blog Jim Fitzgerald’s Legacy Inspires an Accidental Train Collector to Build N-Scale Database) and the idea of permanently gluing their collectibles together is anathema.
So in 2019, JTC stepped in and introduced a retrofit kit that allows modelers to add magnets to the containers made by Atlas, Deluxe, Walthers, Micro-Trains and ScaleTrains. These kits do not alter the EXTERIOR of the models they are designed to enhance and hence the collectors can comfortably alter their prize posessions to make them more useful without the guilt of feeling they defaced their own property. If they ever wish to sell their containers, you can always 'undo' the upgrade and sell them to someone else as close to new.
The Prototype
An intermodal container is a large standardized shipping container, designed and built for intermodal freight transport, meaning these containers can be used across different modes of transport – from ship to rail to truck – without unloading and reloading their cargo. Intermodal containers are primarily used to store and transport materials and products efficiently and securely in the global containerized intermodal freight transport system, but smaller numbers are in regional use as well. These containers are known under a number of names, such as simply container, cargo or freight container, ISO container, shipping, sea or ocean container (from Wikipedia).
The Packaging
These kits come three to a bag. These are the old-school poly bags with a cardboard label stapeling them closed. Not exactly collectors containers, but these kits are meant to be installed, not collected, so the packaging is appropriate.
The Kit
Each bag contains the lower section (base) for three containers. The bases are designed to replace the bases of the container they are upgrading. In the review kit we selected the upgrade package for the Micro-Trains 48 foot shipping container. The kit also contains 11 steel plates to be glued into the top of the target containers. You typically would only use 9, but I guess a couple extra never hurt.
The Upgrade Process
OK, I am a typical modeler. I never read instructions unless absolutely necessary, so for this process I decided to take the noob approach and just dive in. I am sure there are excellent instructional videos on JTC's website, but I am going to assume that most modelers would take the same approach and simply give it a whirl without reading anything. Heck, these look simple enough. Although I have to be honest here. I received an excellent tip on assembly from Steve of JTC when I spoke with him in person in June. I will call this out when I get to that step.

Kit Components
First I emptied the contents of the poly-bag onto my desk. Of course the three container bases were all stuck together and all the little steel plates were stuck to the bases. I separated everything out and noticed one magnet had come unglued from its base. I simply pulled out my trusty CA Glue (Super Glue for you non-modelers) and stuck it back on. The nearby magnets threatened to pull it back out again (they are close to one another), so I held it in place with a tool for 30 seconds while the glue set.

MTL 48 foot Containers
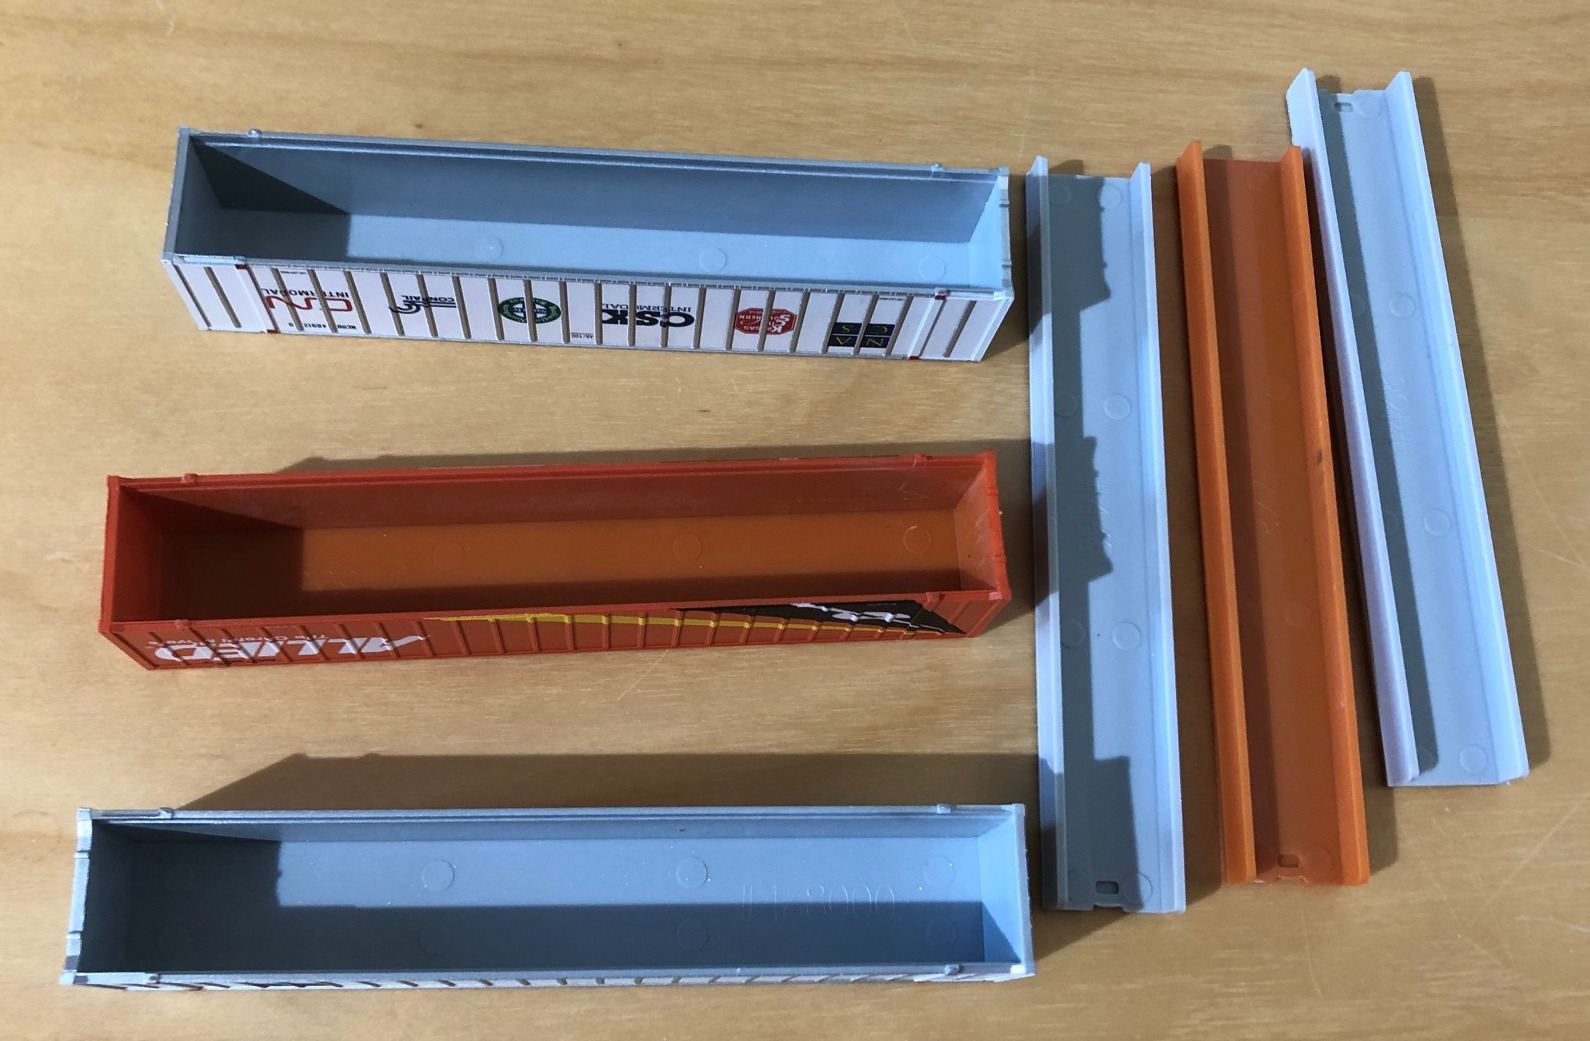
Nex,t I pulled out my three victims, recent Micro-Trains 48 foot containers destined to be used in their new 48' well cars. I found it easy to remove the bases of these three containers using only my finger nails. Took me less than a minute to detach all three. I took a look inside and though the ceilings of the three containers were not perfectly flat, they appeared to be flat enough for the plates to adhere to. Gel CA glue helps make up for any irregularities in the surfaces being adhered to.

Containers Disassembled
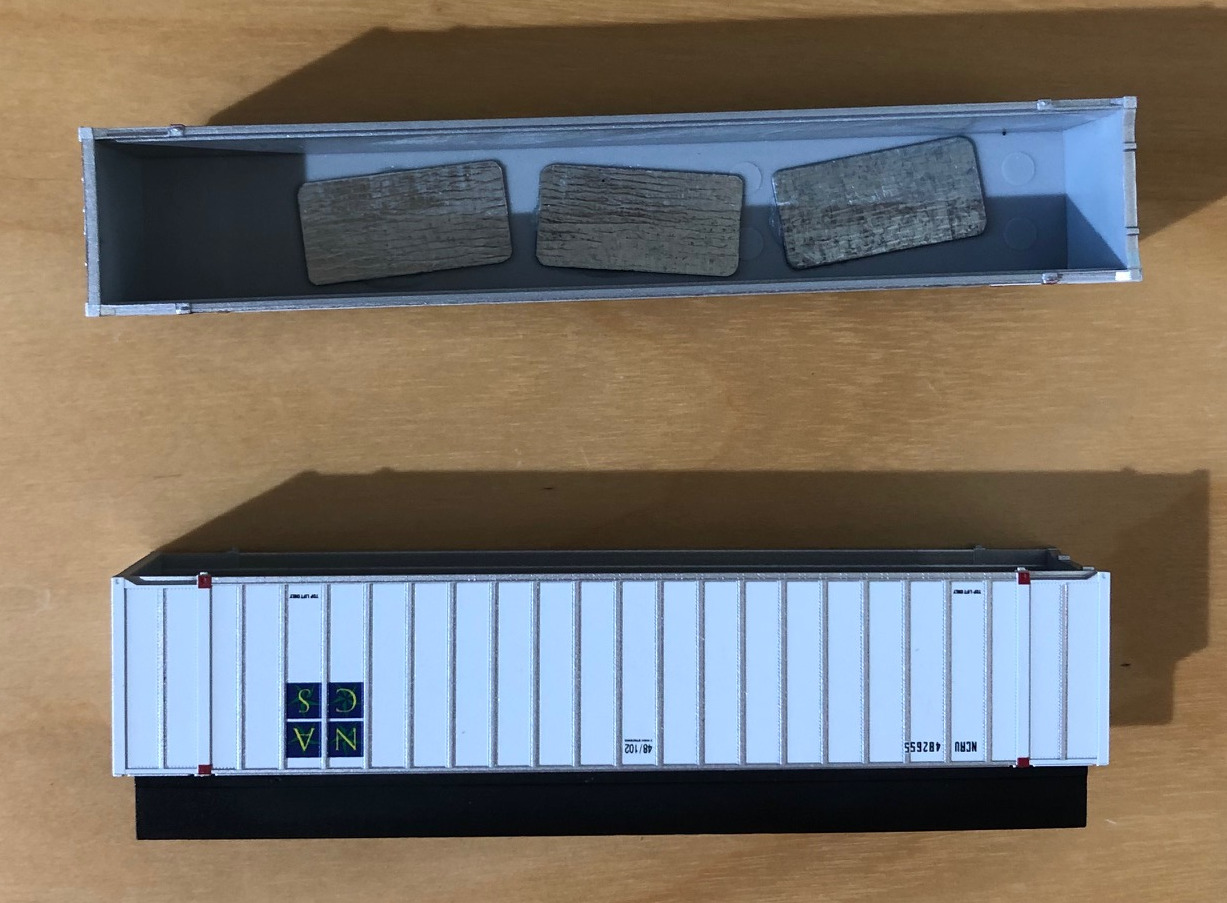
I lined up the bases of the kits with the container shells so I could visually see where the magnets would be on the upper car. This allowed me to target the dollops of glue to be more or less where they should be. I then stuck three plates to the three dollops using tweezers to insert the plates into the shells. So far things were easy.

CA Glue Applied
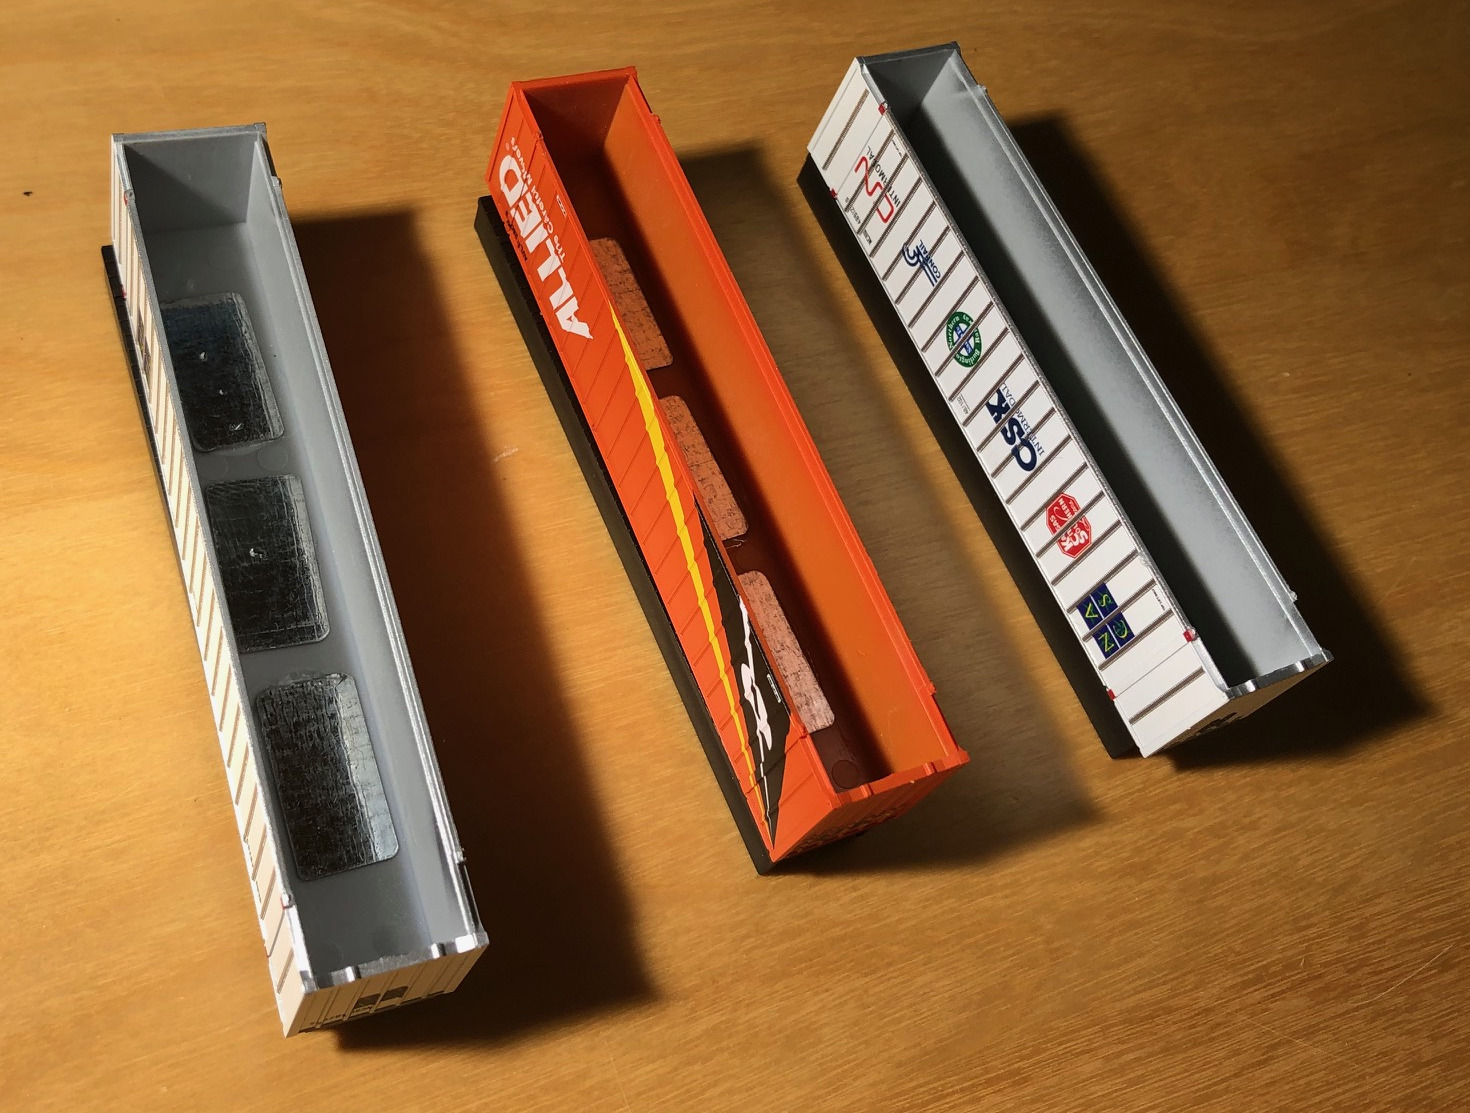
Here is where I cheated and used the advice that JTC gave me. I used the base of the containers - which hold the magnets - and placed them underneath the now upside-down shells. The magnetism reached up through the plastic and drew the steel plates snugly against the ceilings of the shells so as to provide better cohesion as the glue cured. Smart, simple, easy. I am sure the glue would have held just fine without this trick, but I want the installation to last and every bit of help is appreciated. Good tip, Steve.

Using the Bases to Lock the Plates
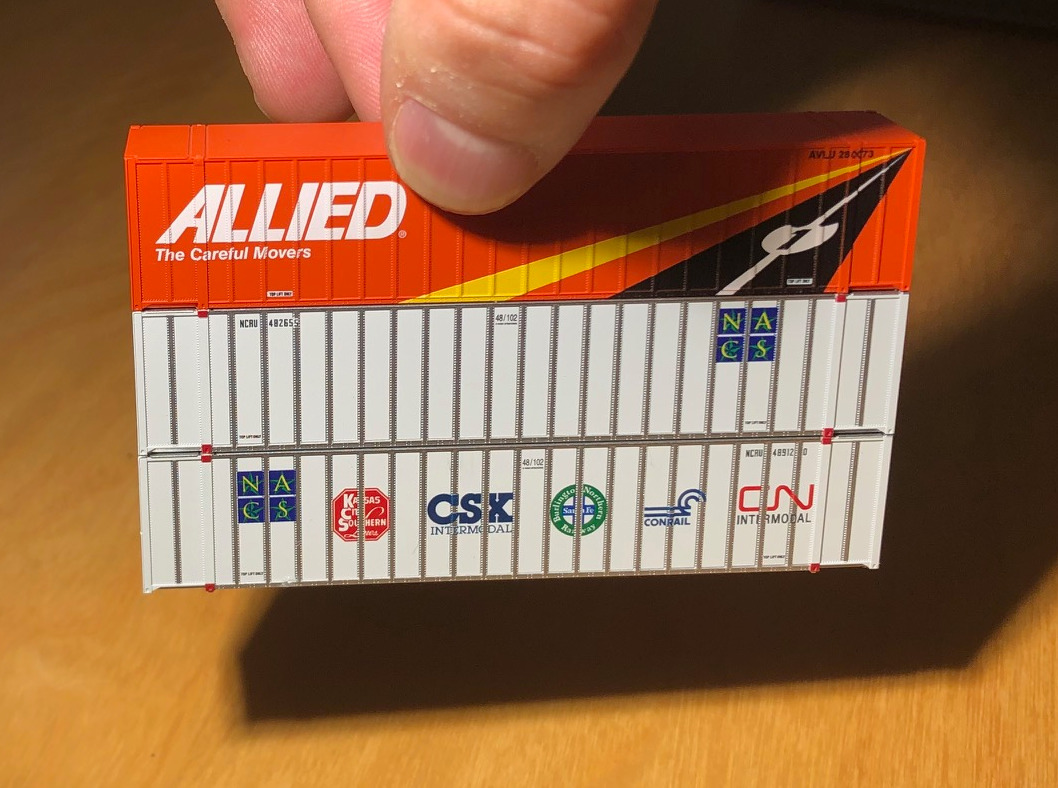
I then put the containers aside to dry while I typed up this review. After they were dry I simply stuck the bases into the shell and voila! The new bases fit perfectly into the MTL shells. All done. I tested them out by stacking all three together and lifting the top container. The lower two held. This demonstration assured me that the containers would hold together during normal train operation, especially when gravity and friction are on your side.

Left to Dry

The Magnets Grip Well
There was only one small catch. With the MTL containers, the color of the bases generally matches the color of the shell. With the JTC replacement bases, they are all black. Not that you would ever see the bases during normal usage, except maybe when you put them on a chassis. But nevertheless, this represents a change in the appearance of the cars. I intend to keep the original bases. If I were ever to sell these containers, I would provide the original bases along with the upgraded containers to the buyer.

Original Bases are a Different Color
Summary
These kits were needed. And they are friendly towards modelers who don't bother to read instructions. I will buy more of them to retrofit all my MTL 48 footers. They were as easy to install as advertised. And they work. The precision of the fit for the new bases into the MTL shells was perfect. The magnets are adequately powerful, though they don't feel quite as strong as the Kato models. But the strength is more than adequate for their intended use. At their price point, they represent a small fraction of the cost of the containers, and that is good. The upgrade should never cost more than the model. That would just feel wrong. Thanks JTC for a high-quality, well-priced, useful kit.
Click here to see a list of all JTC products.
So why would anyone want this? Kato established the benchmark of magnetized containers when they introduced their Maxi-I and Maxi-IV articulated double-stack container cars. Each well of the Kato cars models a prototype that holds TWO containers, one stacked on the other. To run these cars, you need to stack one car on the other. Two keep the upper car from falling off while you are running trains with these cars, Kato installed magnets inside the containers so they would 'stick' together and not have the upper container fall off while your trains are running. Brilliant and simple.
However, none of the other manufacturers of N Scale containers followed suit. Years ago, I heard Dave Ferrari of Deluxe Innovations give a talk on N Scale production where he explained why Deluxe did not put magnets in their N Scale containers. He presented a number of very good reasons why this was a bad idea, but for the life of me, I cannot remember any of them. Obviously, Walthers, Micro-Trains and Atlas agreed with Dave, as their containers also do not have magnets. Even the newest player (other than JTC), ScaleTrains.com did not add magnets to their fancy 53' reefer containers.
One simple solution to this is to simply glue the two containers together. The lower one is locked into the well car by the well, and the upper car is glued to the lower one. This works, but it prevents the modelers from moving the containers around once they are glued in place. Also, many modelers are 'accidental collectors' (see TroveStar blog Jim Fitzgerald’s Legacy Inspires an Accidental Train Collector to Build N-Scale Database) and the idea of permanently gluing their collectibles together is anathema.
So in 2019, JTC stepped in and introduced a retrofit kit that allows modelers to add magnets to the containers made by Atlas, Deluxe, Walthers, Micro-Trains and ScaleTrains. These kits do not alter the EXTERIOR of the models they are designed to enhance and hence the collectors can comfortably alter their prize posessions to make them more useful without the guilt of feeling they defaced their own property. If they ever wish to sell their containers, you can always 'undo' the upgrade and sell them to someone else as close to new.
The Prototype
An intermodal container is a large standardized shipping container, designed and built for intermodal freight transport, meaning these containers can be used across different modes of transport – from ship to rail to truck – without unloading and reloading their cargo. Intermodal containers are primarily used to store and transport materials and products efficiently and securely in the global containerized intermodal freight transport system, but smaller numbers are in regional use as well. These containers are known under a number of names, such as simply container, cargo or freight container, ISO container, shipping, sea or ocean container (from Wikipedia).
The Packaging
These kits come three to a bag. These are the old-school poly bags with a cardboard label stapeling them closed. Not exactly collectors containers, but these kits are meant to be installed, not collected, so the packaging is appropriate.
The Kit
Each bag contains the lower section (base) for three containers. The bases are designed to replace the bases of the container they are upgrading. In the review kit we selected the upgrade package for the Micro-Trains 48 foot shipping container. The kit also contains 11 steel plates to be glued into the top of the target containers. You typically would only use 9, but I guess a couple extra never hurt.
The Upgrade Process
OK, I am a typical modeler. I never read instructions unless absolutely necessary, so for this process I decided to take the noob approach and just dive in. I am sure there are excellent instructional videos on JTC's website, but I am going to assume that most modelers would take the same approach and simply give it a whirl without reading anything. Heck, these look simple enough. Although I have to be honest here. I received an excellent tip on assembly from Steve of JTC when I spoke with him in person in June. I will call this out when I get to that step.

First I emptied the contents of the poly-bag onto my desk. Of course the three container bases were all stuck together and all the little steel plates were stuck to the bases. I separated everything out and noticed one magnet had come unglued from its base. I simply pulled out my trusty CA Glue (Super Glue for you non-modelers) and stuck it back on. The nearby magnets threatened to pull it back out again (they are close to one another), so I held it in place with a tool for 30 seconds while the glue set.

Nex,t I pulled out my three victims, recent Micro-Trains 48 foot containers destined to be used in their new 48' well cars. I found it easy to remove the bases of these three containers using only my finger nails. Took me less than a minute to detach all three. I took a look inside and though the ceilings of the three containers were not perfectly flat, they appeared to be flat enough for the plates to adhere to. Gel CA glue helps make up for any irregularities in the surfaces being adhered to.

I lined up the bases of the kits with the container shells so I could visually see where the magnets would be on the upper car. This allowed me to target the dollops of glue to be more or less where they should be. I then stuck three plates to the three dollops using tweezers to insert the plates into the shells. So far things were easy.

Here is where I cheated and used the advice that JTC gave me. I used the base of the containers - which hold the magnets - and placed them underneath the now upside-down shells. The magnetism reached up through the plastic and drew the steel plates snugly against the ceilings of the shells so as to provide better cohesion as the glue cured. Smart, simple, easy. I am sure the glue would have held just fine without this trick, but I want the installation to last and every bit of help is appreciated. Good tip, Steve.

I then put the containers aside to dry while I typed up this review. After they were dry I simply stuck the bases into the shell and voila! The new bases fit perfectly into the MTL shells. All done. I tested them out by stacking all three together and lifting the top container. The lower two held. This demonstration assured me that the containers would hold together during normal train operation, especially when gravity and friction are on your side.


There was only one small catch. With the MTL containers, the color of the bases generally matches the color of the shell. With the JTC replacement bases, they are all black. Not that you would ever see the bases during normal usage, except maybe when you put them on a chassis. But nevertheless, this represents a change in the appearance of the cars. I intend to keep the original bases. If I were ever to sell these containers, I would provide the original bases along with the upgraded containers to the buyer.

Summary
These kits were needed. And they are friendly towards modelers who don't bother to read instructions. I will buy more of them to retrofit all my MTL 48 footers. They were as easy to install as advertised. And they work. The precision of the fit for the new bases into the MTL shells was perfect. The magnets are adequately powerful, though they don't feel quite as strong as the Kato models. But the strength is more than adequate for their intended use. At their price point, they represent a small fraction of the cost of the containers, and that is good. The upgrade should never cost more than the model. That would just feel wrong. Thanks JTC for a high-quality, well-priced, useful kit.
Review to be continued in this other article: Jacksonville Terminal Co. N-Scale Container Magnet Kits: A Good Add-on to ScaleTrains.com Containers
Click here to see a list of all JTC products.

